Hyperbolic Flexors
Summary:
Craft: Build flexible cardbord models of the hyperbolic, and see how they contort to fit into three dimensional space
Math: Examine the consequences of many hyperbolic verticies attached together. Look into the size and shape of a section of the hyperbolic plane.

summary
Last class we examined how different tilings can force nonzero curvature. Today we’ll build a more robust model of a negatively curved surface using cardboard and tape. These make very nice twiddle toys, because the dihedreal angle between cardboard planes is flexible. By placing many hyperbolic vertices together, we will see how the hyperbolic plane contorts itself in three dimensional space.
Activity
Part 1: drawing the hyperbolic plane
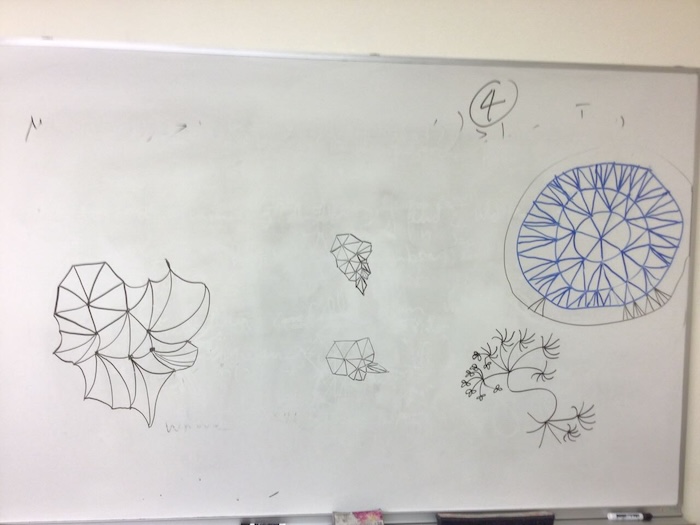
From Annie Perkins: Question: On the blackboard, draw as manny connected triangles as you can, with seven edges at each vertex. What do you notice happens? Could you keep going forever?
Here are my student’s attempts. They quickly found that they ran out of room, and needed to curve or contort the lines to fit. No matter what, the couldn’t keep going forever.
Hyperbolic cardboard
I saw this concept from Daniel Piker’s tweet. I will reproduce his instructions here, because twitter is not very friendly for non-users.
“Take 6 squares of stiff cardboard and tape them together along half the length of their edges. You can start with them flat and work your way round in a spiral. To make it a bit stronger, you can put tape on both sides of each hinge.”
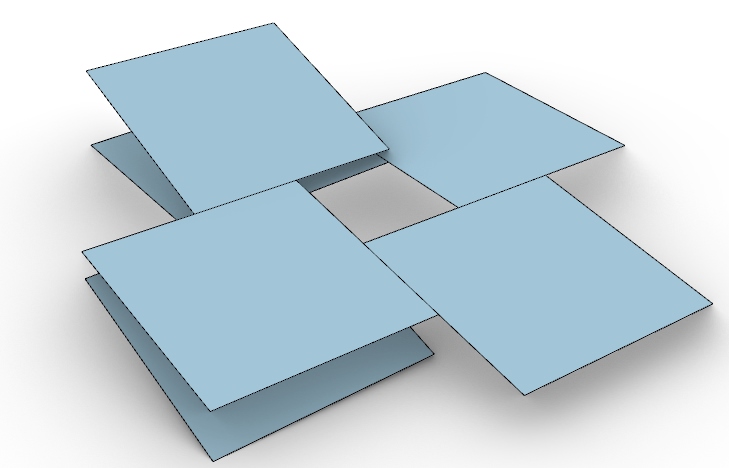
“Once you get to the last one, to close the loop you need to arrange them in 3d so the inner opening forms a shape like a seat (if you join them in the other arrangement it will be rigid and not a mechanism). To tape this last pair, it can help to place them on the edge of a table”
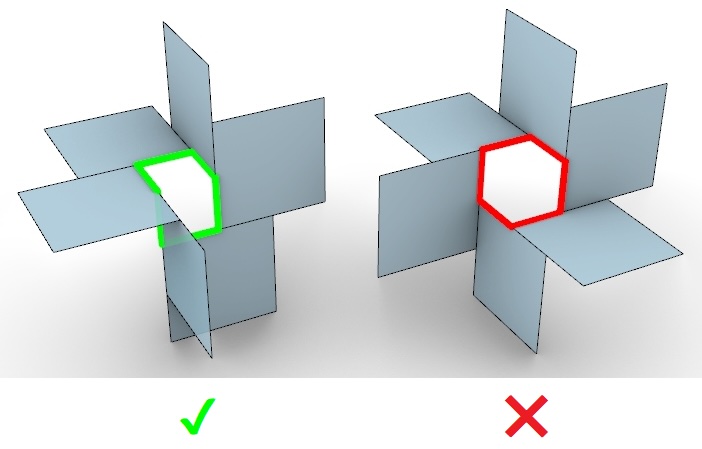
The resulting shape is a great fidget toy, because it has one degree of freedom. By bending any one pair of cardboard squares together, the entire mechanism flexes in unison. I will call this construction a “hyperbolic flexor”. They can be extended in several ways.
- You can put more squares around in a spiral before closing it up
- You can use different shapes than squares.
- You can attach multiple flexors together.
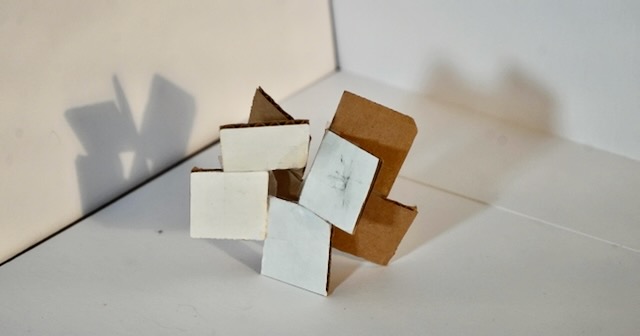
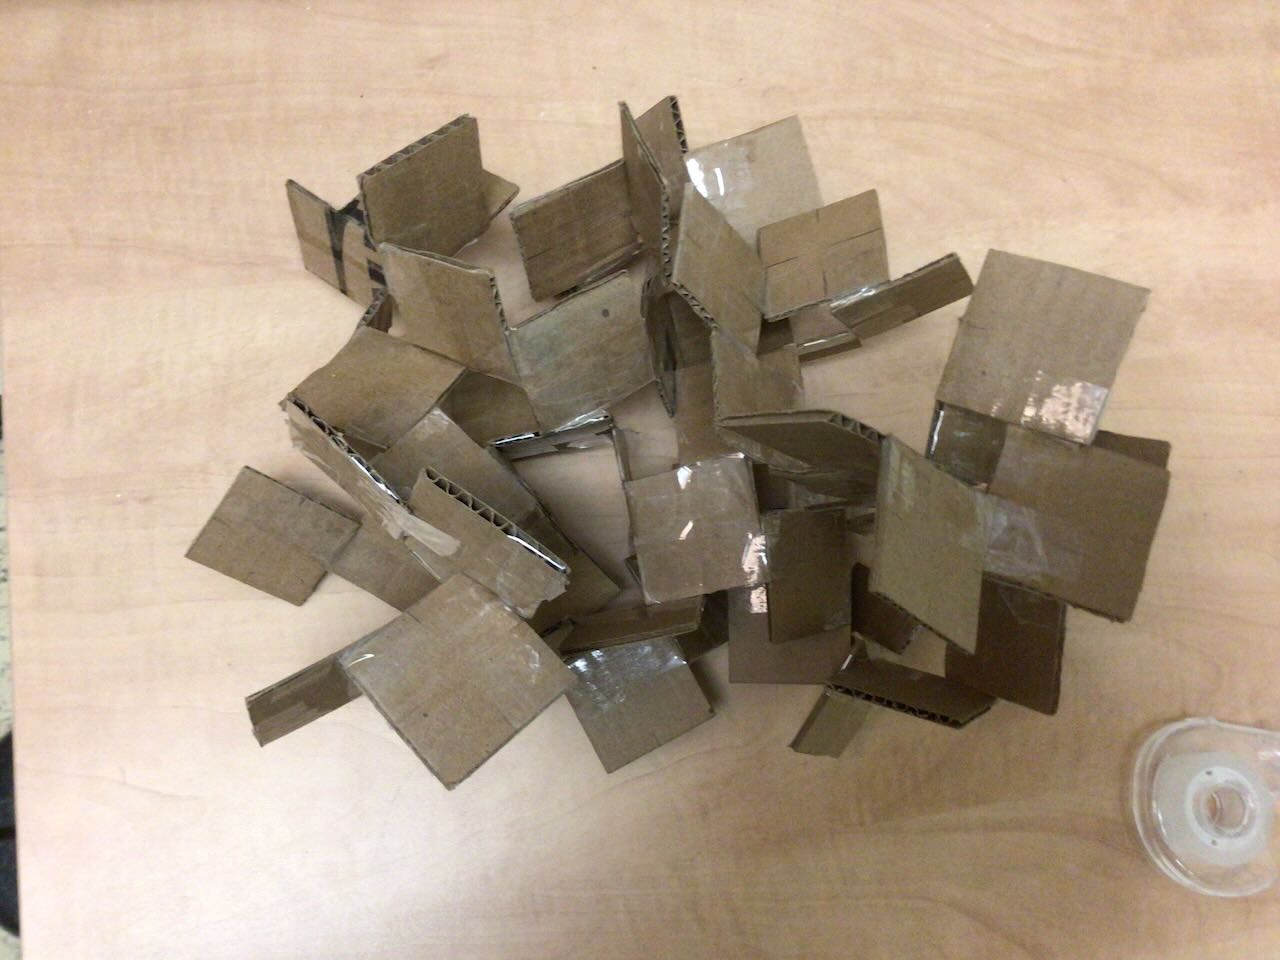
For my class, I cut out many copies of equilateral triangles and squares out of cardboard. For your convenience, here is a template I used for triangles and squares. Then I had people try to build different flexors. Using the rules above, you should be able to construct a flexor for every pair $(n,m)$, where $n$ is the number of sides in your shape, and $m$ is the number of shapes used to construct the flexor. I had the students analyze:
- What is the number of degrees of freedom of the mechanism?
- Is this spherical, flat, or hyperbolic?
I made sure the students made:
- 6 square flexors
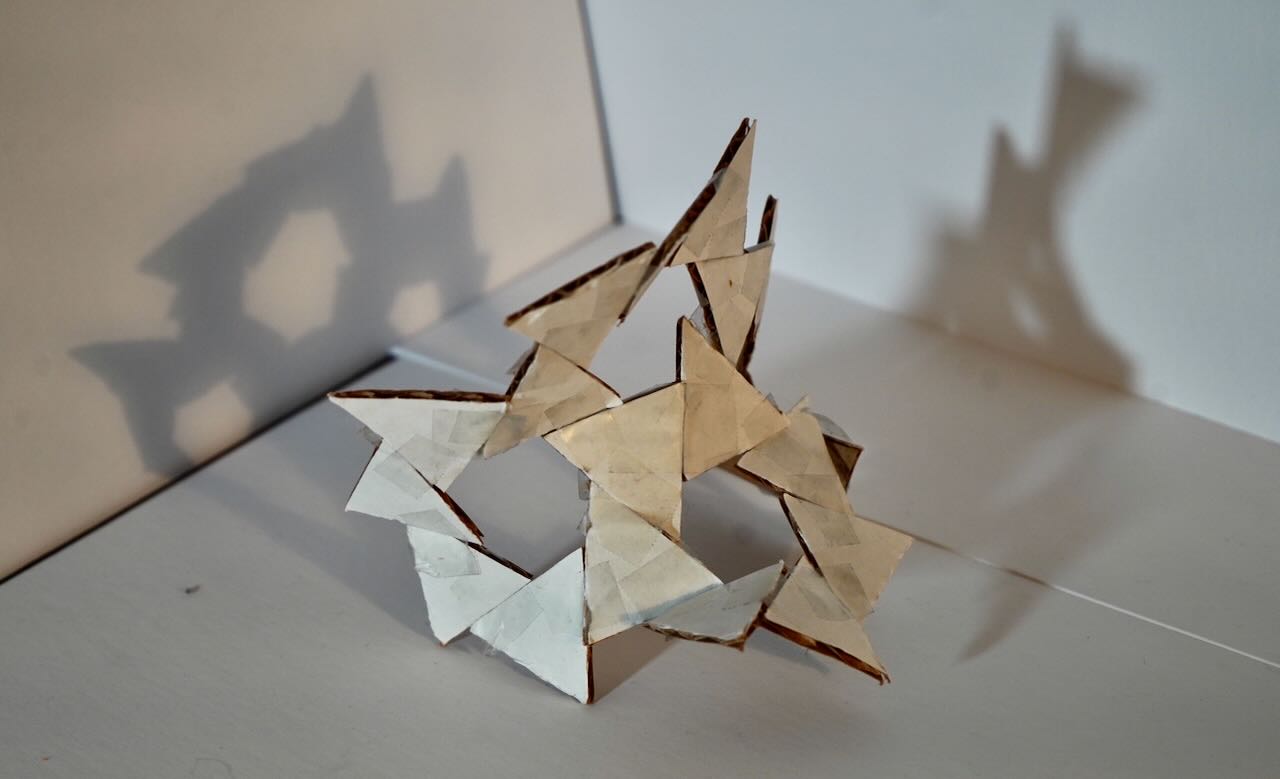
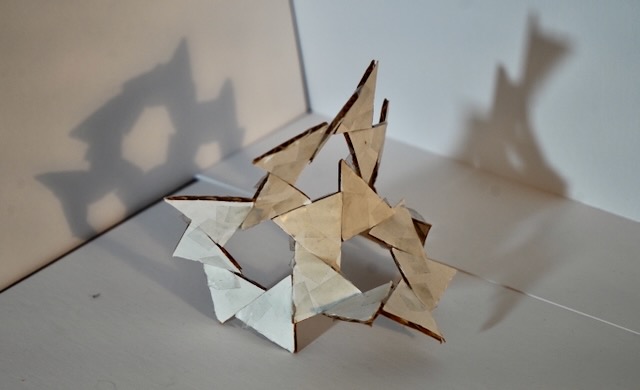
- 7 triangle flexors
and then I let them try some others. Here are some examples of my own. :
 |
|---|
| A flexor with eight squares |
 |
|---|
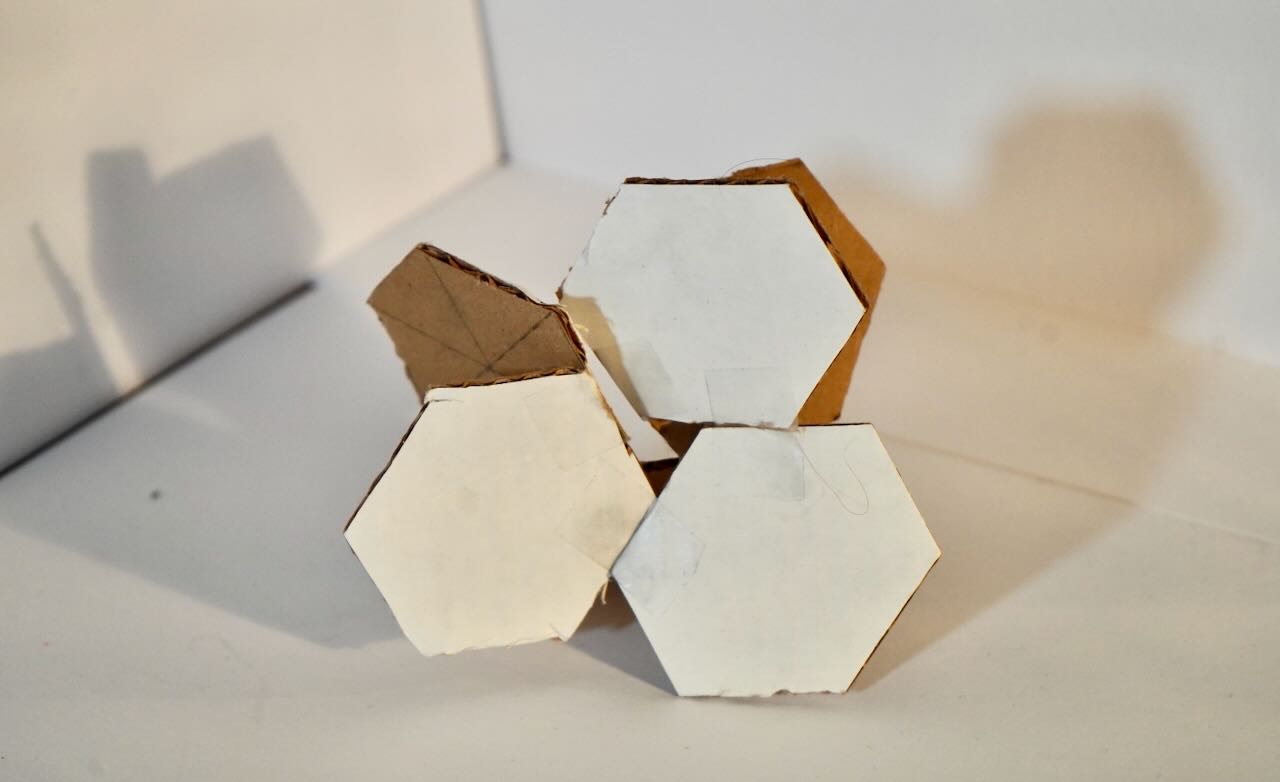
| A flexor with six hexagons |
 |
|---|
| Four flexors together, 7 triangles each. Notice how it contorts into the familiar saddle shape of hyperbolic space. |
Multiple flexors together
Next we put multiple flexors together. Here are 4 six-fold square flexors, all sharing a single square. Notice how the full object still has one degrees of freedom.
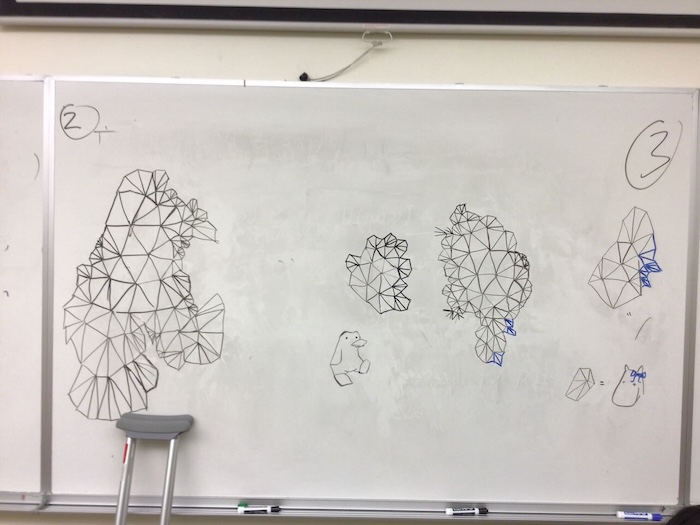
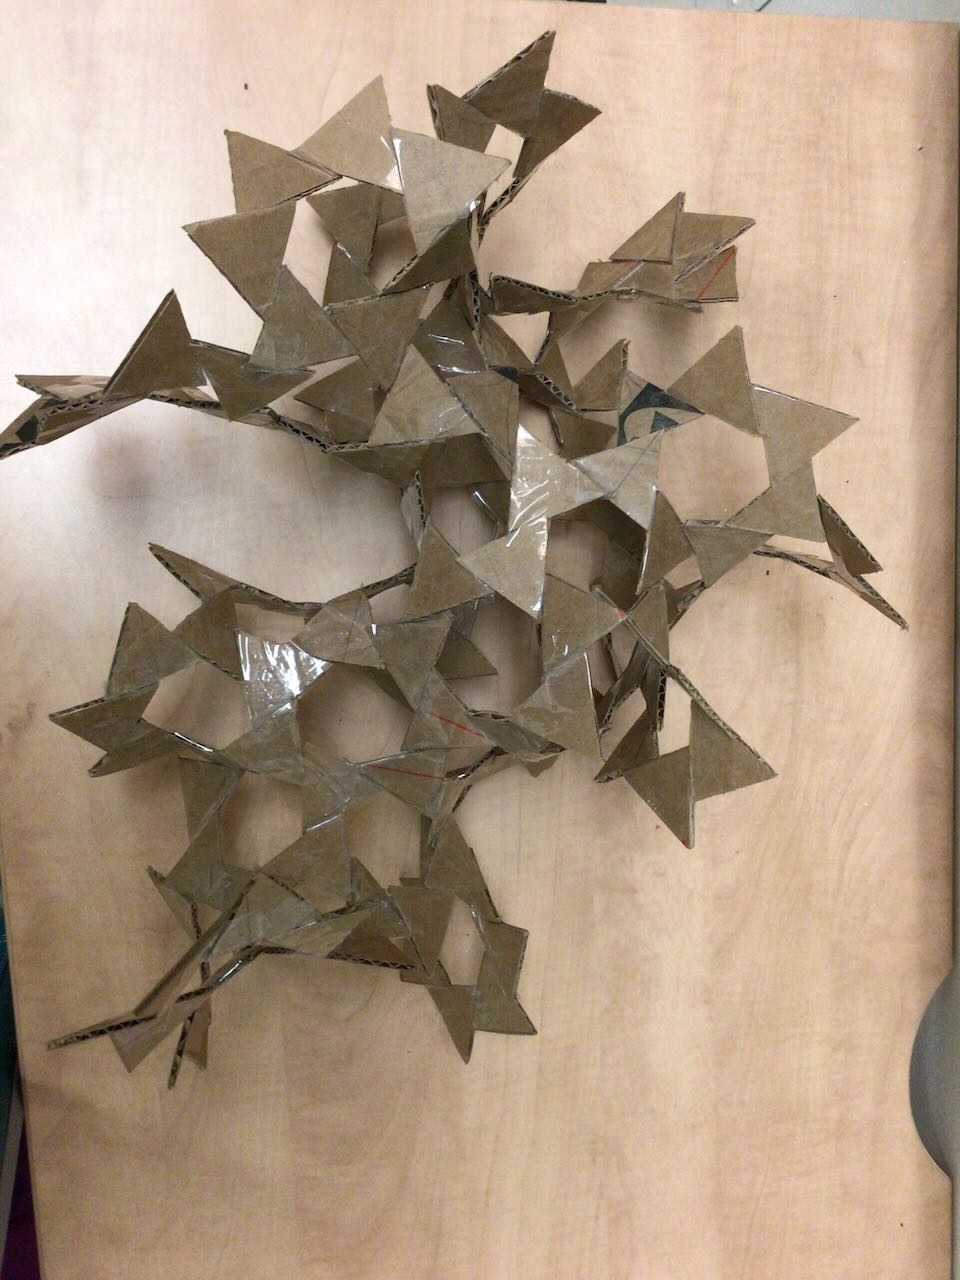
Then, I had the class put all the flexors together into one, giant flexor.
 |
|---|
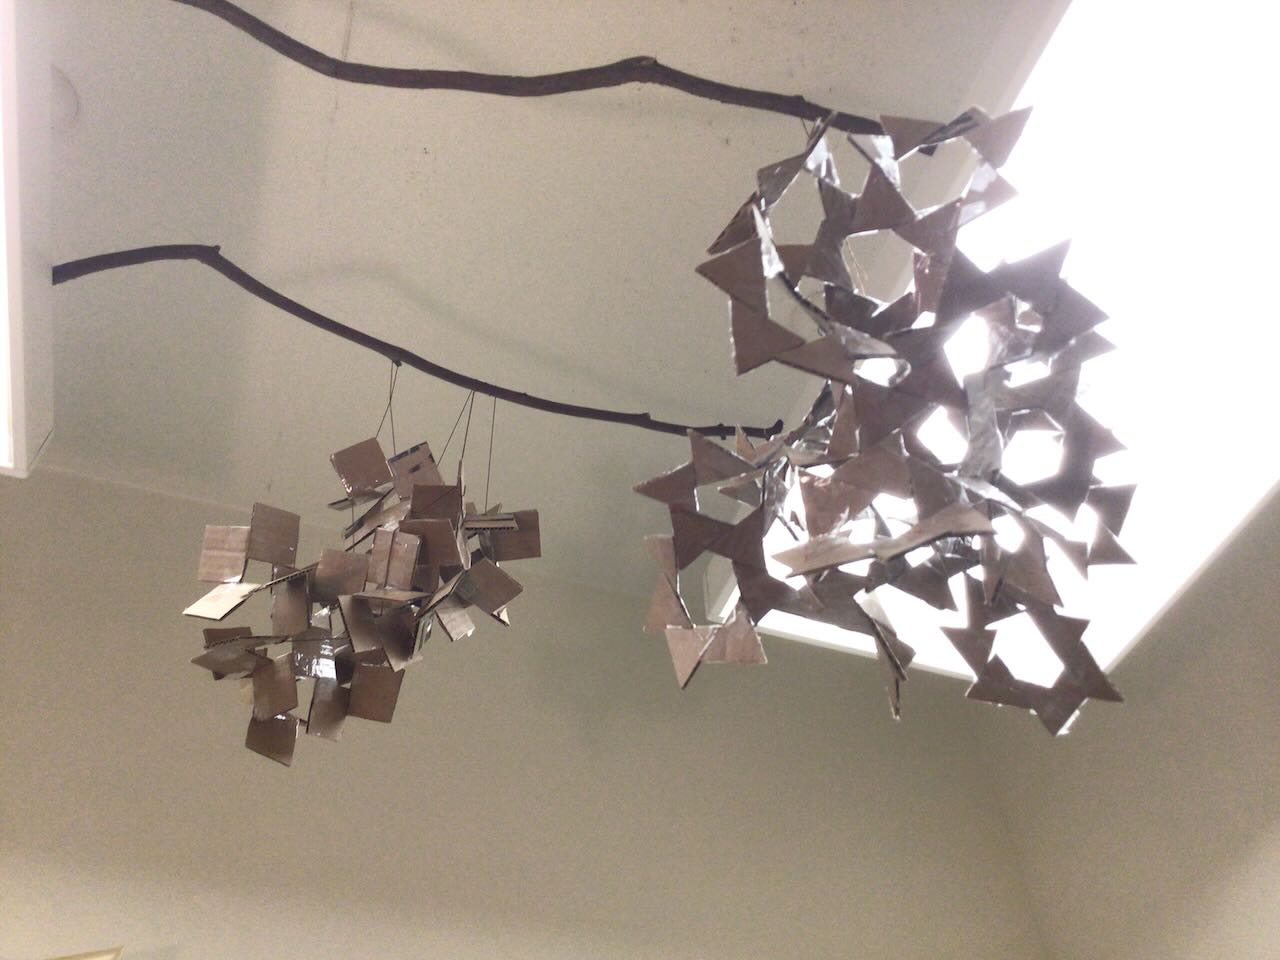
| A massive hyperbolic plane, made out of triangular flexors |
 |
|---|
| A massive hyperbolic plane, made out of square flexors |
Hypothetically, these are still one degree of freedom, so flexing any two cardboard pieces makes the whole thing move in unison. in reality, cardboard is flexible, and these objects are quite wiggly. Still, they make good office decour.